The Final of the Final as I like to call it as there have been so many versions of editing before this. Enjoy! By the way, its with music and sound effect, so turn up your speaker (but not too loud) The sound and music did take some time to find and adjust to the correct timing of the video. But hey, I think its all worth it. Sound adds 'color' to the video!
Wednesday 26 September 2012
The long long shot
This is the main bulk of the sequence where the actor will hold the rock for a few seconds before throwing it out of the screen. In total it is about 20 seconds. Behind the scenes, it took days to complete the whole sequence with many overnights and meticulous editing. I will not show all the frames with the different effects added as it is best seen in the breakdown. I will provide some comments not visible in the breakdown.
Nuke is used to do further 'correction' to the rock such that it looks natural in the scene. Motion blur is added when the rock is falling down at a fast speed. There is light wrap and defocus to blend the rock with the background. As you can see below, the rock now looks 'in place' in the scene.


Below is one of the stock footage elements used in the scene.
AE is then used for the compositing of the effects next as the rendering and UI is more efficient to handle these compositing. The final scene below is created with all the effects and CG elements inside, from the rock to the surrounding effects. As mentioned previously, composting effects and CG is all about the timing, scale and colour accuracy of the footages which adds to the realism of the composed image. This is a very very tedious process of placing the effects layer by layer, rendering them out again and again to ensure that the final results look natural. I try to achieve as much movie realism to this whole scene as must as possible. =) If you were to look at the ground fracture here, it is timed very nicely with the appropriate amount of debri and dust sprayed in my opinion. (see the final production post later)

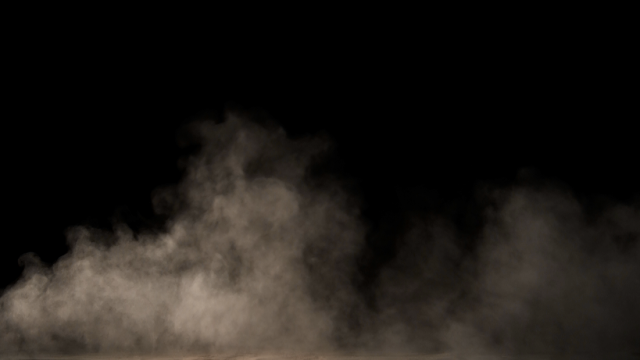
Example of dust falling footage:


Dirt splatter:

And yes, finally camera shake is added to conclude the whole foray. How can there be ground fracture, crashing rocks without a fair amount of shake by the camera!
Nuke is used to do further 'correction' to the rock such that it looks natural in the scene. Motion blur is added when the rock is falling down at a fast speed. There is light wrap and defocus to blend the rock with the background. As you can see below, the rock now looks 'in place' in the scene.

Next the shadow of the rock rendered from Maya is composed in with Nuke too. The shadow is given a defocus to blur the edges. The shadow opacity is also configured to match the scene's natural shadow. It must not be too opaque or too light. Next to take into consideration will be the rock when it gets closer to the ground after the throw. The shadow is deliberately made more opaque (darker) as the rock gets nearer to the ground. And before the rock reaches the actor during the initial fall, its shadow is smaller and more faded. These are some of the things not seen in the scene as it happens too quickly. However, I understand from the ILM folks that this is what they will be doing too and try to achieve their level of perfectionism. =D

Below is one of the stock footage elements used in the scene.

AE is then used for the compositing of the effects next as the rendering and UI is more efficient to handle these compositing. The final scene below is created with all the effects and CG elements inside, from the rock to the surrounding effects. As mentioned previously, composting effects and CG is all about the timing, scale and colour accuracy of the footages which adds to the realism of the composed image. This is a very very tedious process of placing the effects layer by layer, rendering them out again and again to ensure that the final results look natural. I try to achieve as much movie realism to this whole scene as must as possible. =) If you were to look at the ground fracture here, it is timed very nicely with the appropriate amount of debri and dust sprayed in my opinion. (see the final production post later)

Example of dust falling footage:

Rock with dust falling particles composed:

The last part on the dirt splatter is a last minute idea I had. I knew that I have the blood splatter effect with me. Thus, a thought stuck that I can make it a dirt splatter instead. I change the color of the splatter from red to dark brown. Thereafter, I noticed that the splatter is fairly transparent and added another similar layer to it to make it look thicker like mud. Thus, the result is achieve!
Blood splatter with 2 layers:

Dirt splatter:

Stepped on a crack!
The next scene is due to the weight of carrying the rock by the actor, he 'pressed' into the ground resulting in a fracture to the ground.
A few stock footages are used, mainly the dust burst and the debri sprayed from the ground. The crack animation is found online and was also timed and composed in. The difficulty about using stock footages is that the timing may not be as what one require and the scale is also not to preference at times. Thus, there is a fair bit of mix and match and editing to ensure that the scale, color and timing looks correct to the scene.
Example of a dust burst footage:

Example of debri footage:

Original plate:

Shadow removed:

Debri and cracks (blurred):

Roto-ed legs to bring it up front:

Dust burst and debri at legs and cracks. This was timed precisely to the crack formation such that both debri and dust will surface there and then.

Bugs are crawling up my face!
Next will be the bugs scene where the bugs will crawl up the actor's face. This is done in AE with a glass effect. Although this effect seems easy, I spent almost a day to complete the whole sequence. This is as I have to take into consideration the displacement of the bump must not be too much or too little such that it looks unnatural. Then, there is the amount of shadow of the bump and the color of the bump to match the color of the skin tone and the background that needs to be configured. Lastly, the motion of the crawling bugs must be different for each and must not collide with each other.
Original plate:

Color corrected:

Displacement:

Red eye scene
I shall now describe all the scenes one by one on the techniques and solutions used and the difficulties faced along the way.
Below is the first scene whereby the actor gets a red eye effect. Although most of the scenes can be done through either Nuke or After Effects, AE is used in most post production. All the color correction of the scenes are done using Nuke. For most composition, I chose AE mainly due to its faster preview render than Nuke.
Original plate:

Color corrected:

Red eye roto added to the eyes. The eyes are motion-tracked. Once the track is in place. It is a process of fine tuning the roto to match every frame.

Finally the reduced opacity of 'red eye'.

Rock- Textured and Lighted
Apologies to viewers of this blog for the severe lack of updates. This is as I have been focusing on completion of the final production video and the breakdown and has neglected this site. I will update the information from where I left off.
Let me describe the process of getting the ideal rock(meteor) first. The original rock model from Turbosquid looks like the below as I have shown in my previous post.

However its size, shape does not fit the scene which I have. I did some changes to the modelling by resizing and extruding some parts of the default model.

Once it is ok, I added in the texture with a higher repeat UV value such that it looks like a larger rock with the finer details. Then after, I added in a different bump map that looks like a noise map, adjusted the bump value to reach the ideal texture. The image below is before rendering and does not look that good. But it gives a pretty good idea of how the rock turned out from the default one.

Finally I put in the lighting to add realism to the rock. As you can see below, the background plate has a scene under a bright sun. Thus, the top directional light added has strong intensity. For all the lights, I turned on Raytraced shadows. Due to the irregular shape of the rock, this gives a result of irregular shadow patterns at the bottom half of the rock. The bottom cannot be too dark also due to indirect lighting from the light bounce from the ground and the ambient lighting from the surrounding. Therefore, more lights with required intensity are added to the side and bottom of the rock which are visible to the viewer. This gives the rock a better feel of depth.

The position of some of the directional lightings shown below.

The final result is as below. It looks like a really big rock which is 'correct looking' to me when composed with the backplate. The shadow was rendered separately to be composed in later.

Once the rock was textured, a tedious process of animating the rock sequence commenced. I have to time the appropriate motion of the rock whenever the actor in the scene moves. The rock has to follow the actor movement of his hands in either a translation or/and rotation of the invisible rock. If the actor moves and the rock does not, the CG rock will not look in place. Thus, I dedicated quite a fair bit of time to ensure that everything was correct. With 479 frames to look at, it took quite some time and effort to accomplished this result. You can see this in the final production video.
Subscribe to:
Posts (Atom)